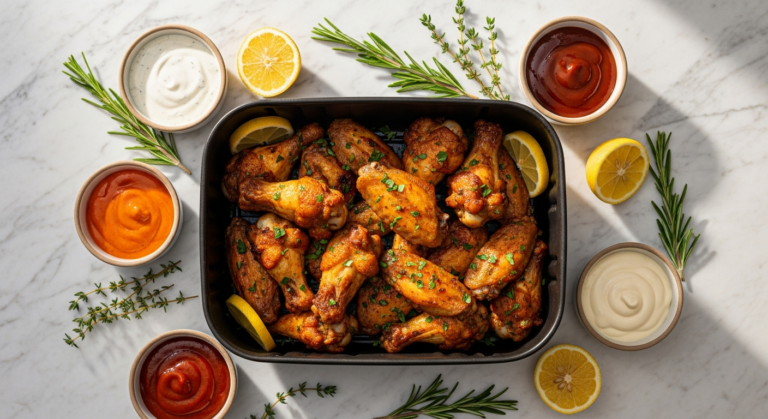
Kitchen Upgrade Guide: Moving from Budget to Pro Tools (Without Wasting Money)
Some links below are affiliate links. If you buy through them I may earn a small commission at no extra cost to you. I only recommend gear I’ve actually cooked with. #ad
There’s a moment most home cooks hit about a year into cooking seriously: the starter gear that got you here starts to feel like the thing holding you back. The knife slips instead of slices. The thin pan scorches one side of everything. The blender stalls on a smoothie. After a decade of testing more than 500 pieces of kitchen equipment from my Portland kitchen, I can tell you the fix is almost never “replace everything.” It’s replacing the right things, in the right order.
This is the upgrade path I’d give a friend who already owns a basic setup (if you don’t yet, start with my kitchen essentials guide for a first apartment instead). The goal here isn’t to spend the most money — it’s to spend it in the sequence that changes your cooking the fastest, while skipping the upgrades that look impressive and do nothing.
The upgrade order, in one paragraph
Upgrade in this sequence: (1) your chef’s knife, (2) one excellent skillet, (3) a proper cookware set, (4) the single small appliance you actually use daily, and (5) the small “pro” details — an instant-read thermometer, a digital scale, and a real cutting board. Each step delivers more noticeable improvement per dollar than the one after it, so if you stop halfway you’ve still upgraded the things that matter most. Everything below that line — single-use gadgets, premium versions of tools you rarely touch — is where money quietly disappears.
How to know a tool is actually worth upgrading
Before you spend on anything, run it through three questions. This is the same filter professional cooks use without thinking about it, and it’ll save you more money than any coupon.
- How often do I use it? Daily-use tools (knife, skillet, board) justify real money. A tool you reach for twice a year does not, no matter how good the premium version is.
- Does better quality actually change the result? A sharp, balanced knife changes every cut you make. A premium garlic press makes garlic exactly as crushed as a basic one. Spend where quality shows up on the plate.
- Is the cheap version failing or degrading? A warped pan that heats unevenly, a knife that won’t hold an edge, a non-stick surface that’s flaking — those are upgrade signals. “It still works fine” usually means: don’t upgrade yet.
If a tool clears all three — used often, quality changes the result, current one is failing — it’s a real upgrade. If it clears none, you’re shopping, not upgrading. Keep that distinction and the rest of this guide gets easy.
Upgrade #1 — Your chef’s knife (the highest return per dollar)
If you do nothing else on this list, do this one. Your chef’s knife touches roughly 90% of everything you prep, which means a better knife improves 90% of your cooking — not the dish, the experience of making it. Onions stop making you cry because you’re slicing instead of crushing. Prep gets faster, so you cook more often. It’s the single clearest “why did I wait so long” upgrade in the kitchen.
Here’s the part most guides get wrong: “pro” does not mean “expensive.” A mid-priced, full-tang chef’s knife with a comfortable handle and an edge you keep sharp will out-cook a neglected luxury blade every single day. What you’re actually buying when you upgrade is better steel that holds an edge longer and a balance that doesn’t fatigue your hand. I cover specific picks and what to look for in my tested kitchen gadgets guide, but the short version: an 8-inch chef’s knife that feels right in your hand beats whatever a list told you to buy.
One non-negotiable that comes free with this upgrade: a knife is only as good as its edge. Budget for a sharpener (or a honing routine) at the same time, and read up on keeping your tools in shape so the upgrade actually lasts. A sharp cheap knife beats a dull expensive one — every time.
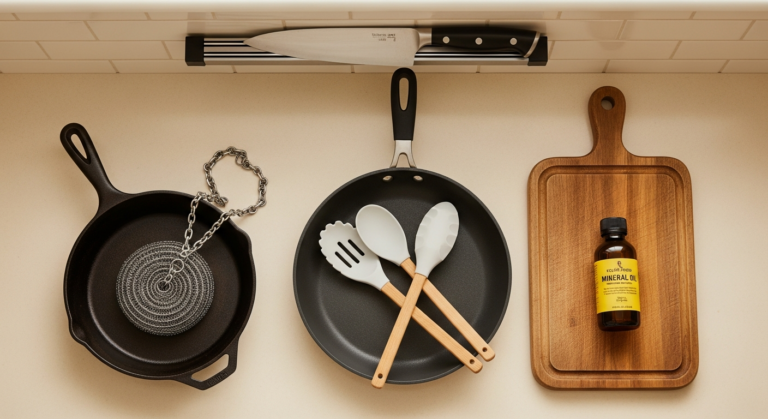
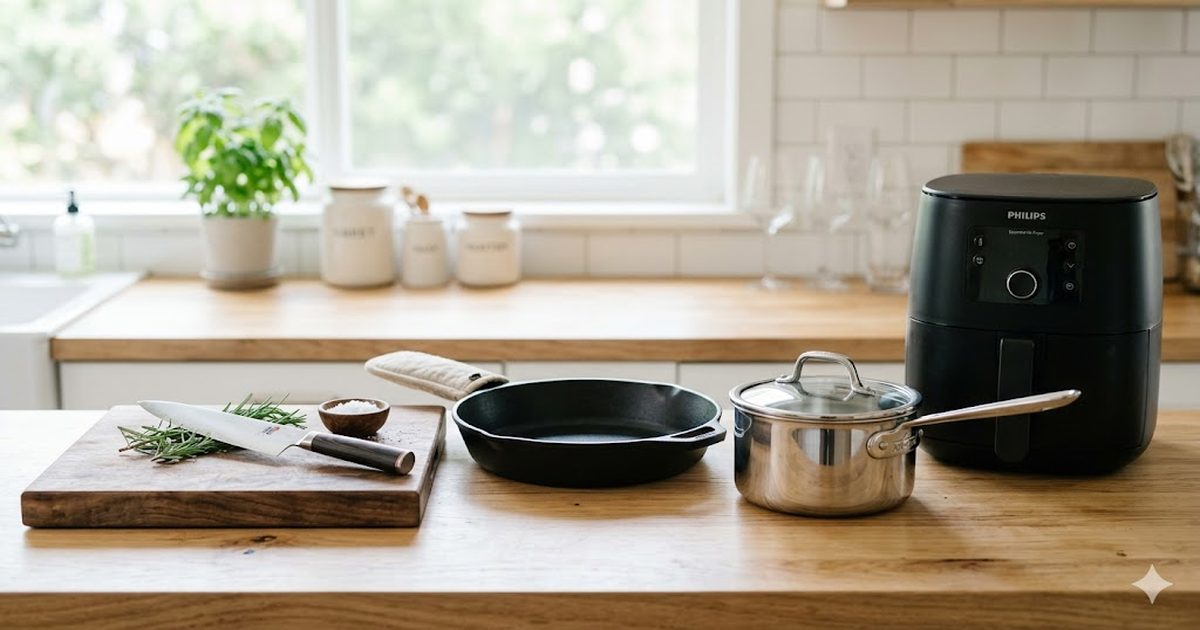
Upgrade #2 — One excellent skillet before a whole set
The mistake here is buying a 12-piece set when what you actually need is one pan that does the heavy lifting. Searing, sautéing, browning, frying — your workhorse skillet handles most of it, so this is where the second upgrade dollar goes. You don’t need to replace your whole rack; you need one pan that holds and spreads heat the way thin starter pans never will.
For most cooks the answer is a cast iron skillet. It’s the rare upgrade that’s also affordable, lasts literally for decades, and gets better with use. It sears better than almost anything in its price range and moves from stovetop to oven without a second thought.
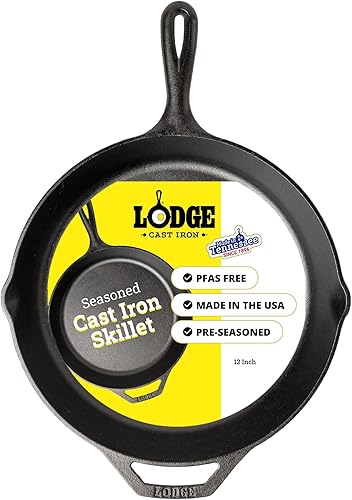
Lodge 10.25″ Cast Iron Skillet
This is the pan I hand to anyone making their first “real” cookware upgrade. The 10.25-inch size is the sweet spot — big enough for a weeknight protein, small enough to handle one-handed once you’re used to the weight. It comes pre-seasoned, takes a sear better than pans many times its cost, and is genuinely a buy-it-once tool if you care for it. The only real adjustments: it’s heavy, and it’s not the move for boiling water or simmering acidic tomato sauce for hours. If you’re torn between cast iron and carbon steel, I broke down exactly who should pick which in my cast iron vs. carbon steel comparison.
Upgrade #3 — A real cookware set (when to stop buying singles)
There’s a tipping point where buying one more individual pan stops making sense. When you find yourself reaching for a saucepan, a sauté pan, and a stockpot in the same week — and your mismatched starter pieces are warping or heating unevenly — it’s time for a coordinated set. A good tri-ply set heats evenly edge to edge, doesn’t develop hot spots, and (the underrated part) the lids and handles actually fit and stack, which quietly makes your kitchen calmer.

Tramontina 12-Piece Tri-Ply Clad Set
This is the set I point people to when they want genuine clad performance without paying flagship-brand prices. Fully clad tri-ply construction means the aluminum core runs all the way up the sides, not just across the bottom, so heat is even where you actually cook. It’s oven-safe, induction-compatible, and the pieces you’ll use most — the skillet and the saucepans — feel reassuringly solid. It’s the “buy this and stop thinking about cookware for ten years” option for most home kitchens. For the full breakdown by material and budget, see my best cookware sets guide.
Worth saying plainly: a set is an upgrade only if you’ll use most of it. If you cook the same three things and reach for one pan, skip the set and put that money into a better version of that one pan instead. The set wins when your cooking has genuinely gotten broader.
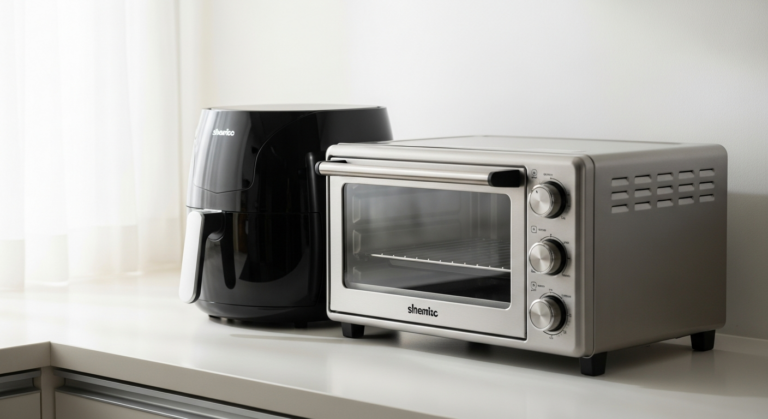
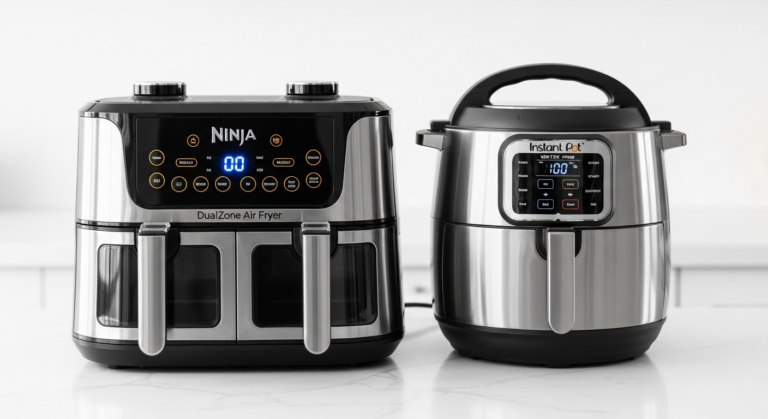
Upgrade #4 — The one small appliance worth the counter space
Counter space is real estate, and most kitchens can’t afford to give it to an appliance that earns its keep twice a month. The upgrade move isn’t to buy more appliances — it’s to upgrade the one you’d use almost daily to a version that’s genuinely better, and ignore the rest. For a huge number of households right now, that one appliance is an air fryer, because it covers weeknight vegetables, proteins, and reheats faster and crispier than the oven without heating the whole kitchen.

Cosori Pro LE 5-Quart Air Fryer
This is my default recommendation for the “I just want one good air fryer” cook. The 5-quart basket is enough for two to four people, the controls are genuinely simple, and the temperature held accurate across my testing — which is the whole game with air fryers. It’s not the move if you’re feeding a big family every night (you’ll want a dual-zone), but for most kitchens it’s the version that earns its counter space. I ranked it against six other models in my best air fryers roundup, and broke down when an air fryer beats your oven in air fryer vs. convection oven.
If your daily appliance is a blender, a stand mixer, or a coffee setup instead, the logic is identical: upgrade that one, not the whole counter. My small kitchen appliances guide walks through which ones genuinely earn the space.
Upgrade #5 — The “pro” details that punch above their size
These are the small, unglamorous upgrades that separate cooks who “follow recipes” from cooks who get consistent results. None of them is expensive, and each fixes a specific recurring frustration.
- An instant-read thermometer. The single fastest way to stop overcooking chicken and steak. It removes guesswork entirely, and a good one reads in two to three seconds. This is the upgrade that most improves the actual food on the plate.
- A digital kitchen scale. If you bake at all, this turns inconsistent results into repeatable ones — weighing flour is far more accurate than scooping. It’s also one of the most affordable paths to better bread, cookies, and pancakes.
- A real cutting board. A large, stable wood or composite board makes prep safer and faster than the thin flexible mats most starter kits include. Pair it with that upgraded knife and the difference is immediate.
These three live at the end of the list only because they’re inexpensive, not because they’re optional. If your budget is tight, a thermometer and a scale deliver an outsized return — arguably more “result per dollar” than anything except the knife.
A simple way to phase your upgrades
You don’t have to buy any of this in one go — and you shouldn’t. The smartest approach is the same tiered logic I use in my apartment-essentials guide: spread upgrades across three phases so each purchase has time to prove itself before the next one.
- Phase one — the starter fixes. The chef’s knife and the two inexpensive “pro details” (thermometer and scale). Together they change your cooking immediately for the least money, so they’re the natural first move.
- Phase two — the step-up. Your workhorse skillet and a better cutting board. This is where prep and searing genuinely level up, and it’s the phase most cooks feel the biggest jump in confidence.
- Phase three — the invest-once pieces. A coordinated cookware set and the one small appliance you’d use daily. These are the larger purchases, so they come last — after your cooking has grown enough to justify them.
Time your bigger buys to sales like Prime Day or the holidays, and let each phase settle before moving on. The point of phasing isn’t just budgeting — it’s making sure you only buy the next tier once you’ve actually outgrown the last one. Plenty of cooks discover they’re perfectly happy stopping after phase two, and that’s a win, not a failure.
What NOT to upgrade (save your money here)
Just as important as the upgrade order is the list of things that feel like upgrades but aren’t. After testing hundreds of these, here’s where I’d tell you to keep your wallet shut.
- Single-use gadgets. The avocado slicer, the egg separator, the strawberry huller — a knife and a spoon already do these jobs. I rounded up the worst offenders in my most overrated kitchen gadgets piece.
- Premium versions of rarely-used tools. A luxury garlic press, an expensive salad spinner, a designer can opener. Quality doesn’t change the result on tools you use occasionally — buy functional and move on.
- “Complete” mega-sets to fill drawers. A 40-piece utensil set is mostly pieces you’ll never touch. Buy the five tools you reach for, in good quality, and skip the bulk.
- A second appliance that does what you already own. If your air fryer toaster oven already crisps, you don’t also need a standalone air fryer. Avoid redundant counter clutter.
The thread running through all of this: upgrades should remove friction or improve results. If a purchase does neither, it’s not an upgrade — it’s a drawer you’ll clean out in a year.
Make your upgrades last
One last thing, because it’s the difference between upgrading once and upgrading repeatedly: better tools only stay better if you maintain them. A great knife dulls without honing. Cast iron rusts if you put it away wet. Non-stick dies early under metal utensils and high heat. Spending more and then neglecting the gear is the most expensive mistake of all. I put everything I know about keeping kitchen tools alive in my complete kitchen tool care guide — read it once and your upgrades will outlast the next three trends.
Frequently asked questions
What kitchen tool should I upgrade first?
Your chef’s knife. It touches around 90% of your food prep, so a sharp, well-balanced knife improves nearly everything you make and the experience of making it. It’s the clearest return-per-dollar upgrade in the kitchen — just budget for keeping it sharp at the same time.
Is expensive cookware actually worth it?
Sometimes. What you’re paying for in good cookware is even heating and durability — a fully clad tri-ply pan won’t develop hot spots, and quality cast iron lasts decades. But “expensive” and “worth it” aren’t the same thing: a mid-priced tri-ply set performs close to flagship brands for far less. Upgrade cookware when your current pans warp or heat unevenly, not because a brand is prestigious.
When should I replace my non-stick pan?
When the coating starts to scratch, flake, or stops releasing food cleanly. A degrading non-stick surface is a genuine upgrade signal. To make the next one last, use only wood or silicone utensils, avoid high heat, and hand-wash it — details I cover in the care guide.
Are professional knives worth it for home cooks?
A quality knife is absolutely worth it — but “professional” matters less than “sharp and comfortable in your hand.” A mid-priced full-tang chef’s knife you keep sharp will outperform a luxury blade you neglect. Buy the one that feels balanced to you, and learn to maintain the edge.
How much should I budget to upgrade my kitchen?
You don’t need to do it all at once — that’s the point of the sequence. Upgrade one tier at a time, starting with the knife, and spread purchases across sales like Prime Day and the holidays. Following the order above, even a single upgrade (the knife, or a thermometer) noticeably improves your cooking, so you can stop at any tier and still come out ahead.
The bottom line
Going from a budget kitchen to a pro-feeling one isn’t about a single shopping spree — it’s about sequence. Sharpen your prep with a better knife, get one skillet that sears properly, add a coordinated set when your cooking grows, upgrade the one appliance you’d use daily, and pick up the small details that quietly fix consistency. Skip the single-use gadgets and the redundant gear, take care of what you buy, and you’ll build a kitchen that feels professional for a fraction of what “buying the best of everything” would cost. Upgrade in order, and every dollar pulls its weight.