The Complete Guide to Kitchen Tool Care: Cast Iron, Knives, Non-Stick, and More
The Complete Guide to Kitchen Tool Care: Cast Iron, Knives, Non-Stick, and More
We test kitchen tools obsessively at Kitchaneers — and we’ve learned that how you care for your gear matters almost as much as what you buy. This guide covers everything: daily cleaning, proper storage, and the rescue moves that bring neglected tools back to life.
Disclosure: This page contains affiliate links. We may earn a commission if you buy through them, at no extra cost to you.
Good tools are an investment. A quality cast iron skillet can outlast you if you treat it right. A high-carbon knife holds an edge for years — or goes dull in months, depending entirely on how you store it. Non-stick pans that feel like new on day one can turn into sticky, scratched disappointments within a year if you make a handful of common mistakes.
The problem isn’t that people don’t care about their kitchen tools. It’s that the care instructions that come in the box are either vague ("hand wash recommended") or missing entirely. And the internet is full of conflicting advice — some of it flat-out wrong.
This guide pulls together everything we’ve learned from years of testing best kitchen gadgets, best cookware sets, and best small kitchen appliances into one practical reference. No filler, no myths — just what actually works.
Why Kitchen Tool Care Actually Matters (And What Neglect Really Costs)
We’ve all done the mental math wrong on this. A $40 non-stick pan seems cheap enough to replace every year or two. But most people go through 2–3 pans in the time a properly cared-for pan would still be performing. Over a decade, that’s a $120–$200 difference — for a single pan.
Scale that across a full kitchen setup and the cost of neglect gets significant fast.
Beyond money, there’s performance. A dull knife doesn’t just slow you down — it’s genuinely more dangerous than a sharp one, because you compensate with force and lose control. A poorly seasoned cast iron pan sticks constantly, which makes cooking frustrating and food worse. A scratched non-stick surface doesn’t just look bad — it releases coating particles that end up in your food.
The upside: most kitchen tool care is genuinely simple once you know the rules. It’s not about spending more time cleaning. It’s about doing the right things in the right order.
Cast Iron Skillets: Cleaning, Seasoning, and Long-Term Storage
Cast iron is the most misunderstood tool in the kitchen. People either treat it like fine china (never using it at all) or abuse it with soap and the dishwasher, then wonder why food sticks.
The truth sits in the middle.
Cleaning cast iron: the real rules
Hot water and a stiff brush handle 90% of cast iron cleaning jobs. While the pan is still warm (not scalding), rinse it under hot water and scrub with a brush or a chain mail scrubber. Food residue releases easily while the pan is warm. Cold cast iron grips stuck-on bits much more stubbornly.
The soap question: a small amount of modern dish soap (which uses surfactants, not the old lye-based formulas) won’t strip seasoning. But you don’t need it. Hot water plus mechanical scrubbing is enough. Save the soap for genuinely greasy messes.
For stubborn stuck food, add a tablespoon of coarse salt and a splash of water to the pan, then scrub. The salt acts as a gentle abrasive and does the job without any risk to the seasoning.
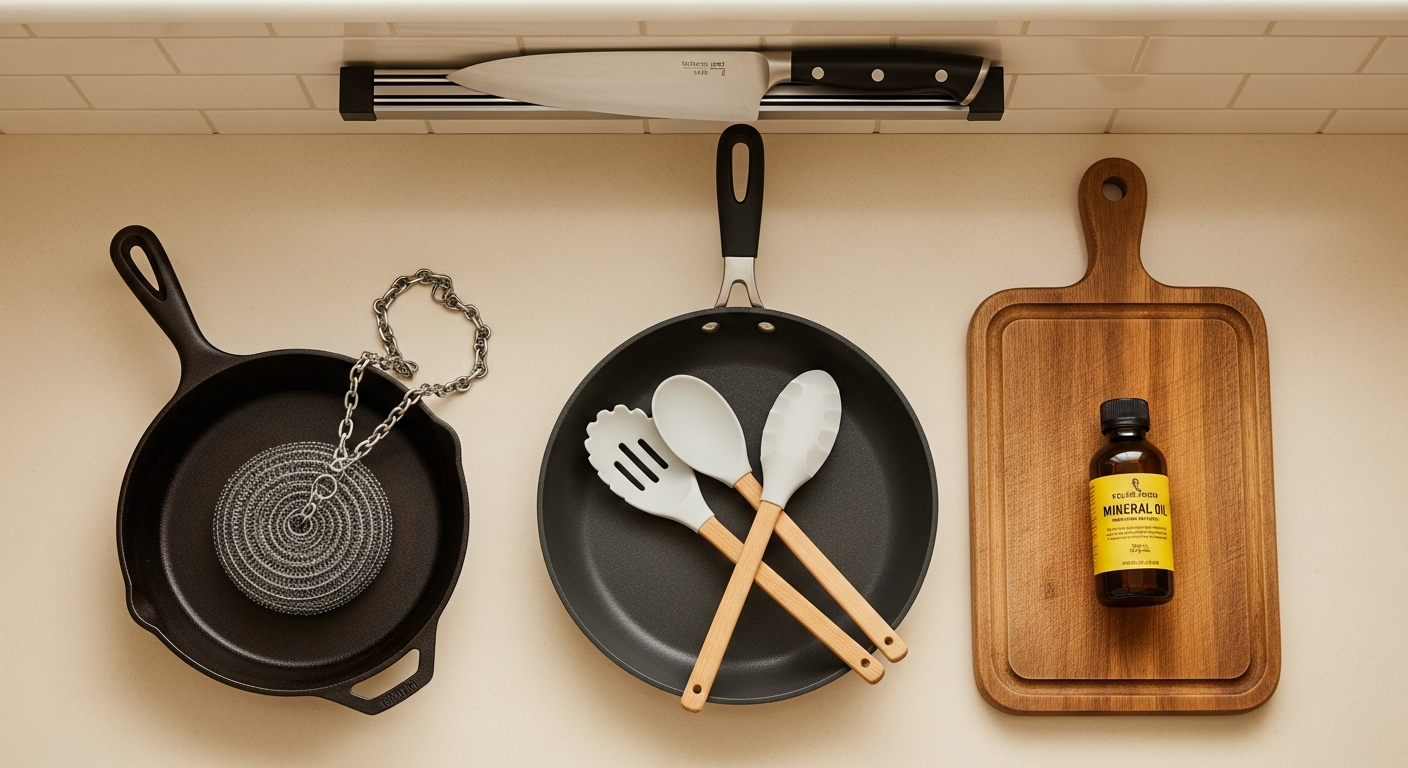
The chain mail scrubber is the right tool here.

The Lodge Chain Mail Scrubber is what we keep next to the sink at Kitchaneers. The stainless steel rings are aggressive enough to knock off stuck food but won’t scratch seasoning or scratch off the surface. Silicone center means you can grab it without burning yourself on a hot pan. About $15 and it lasts for years.
If you’d rather go bigger, The Ringer XL is the full 8×6-inch machine-soldered version — more coverage, same concept, slightly easier to use on a 12-inch skillet.

After washing: dry completely, then oil
This is where people skip a step and end up with rust. After rinsing, put the cast iron on the stove over medium heat for 2–3 minutes. You’re not cooking anything — you’re evaporating every trace of moisture from the pores of the iron. Once it’s bone dry, rub a thin layer of neutral oil (flaxseed, vegetable, or shortening) over the cooking surface with a paper towel. Wipe off the excess — you want the thinnest possible coat. Store uncovered in a dry place.
Seasoning: when and how
A well-used cast iron pan develops seasoning naturally with every cook. But if yours is looking dull, patchy, or food has been sticking despite proper cleaning, a seasoning session takes about an hour.
- Preheat oven to 450°F (230°C). Line the bottom rack with foil.
- Apply a thin coat of flaxseed or vegetable oil to every surface — inside, outside, handle.
- Wipe off virtually all of it. You want the thinnest possible film, not a visible coat.
- Place upside-down on the top rack. Bake for 1 hour.
- Turn off oven. Let it cool inside completely before removing.
Repeat 2–3 times for a fresh pan or one you’ve stripped back to bare iron. Once seasoned, regular cooking does the rest.
Storage
Never stack cast iron directly on other cast iron — the surfaces damage each other. If you must stack, use felt pan separators between pieces (more on those in the cookware storage section below).
Carbon Steel Pans: The Low-Maintenance Alternative That Still Needs Attention
Carbon steel is cast iron’s lighter sibling — same basic care principles, but more reactive and thinner-walled. We covered cast iron vs. carbon steel in depth, but here’s the care summary:
- Clean while warm, same as cast iron. Hot water + chain mail scrubber.
- Dry completely on heat — carbon steel rusts even faster than cast iron if left damp.
- Oil after every wash, same thin-coat method.
- Avoid prolonged acidic foods (tomato sauces, citrus) until the seasoning is well-established — the thinner walls mean acid reaches the iron faster.
- Don’t put it in the dishwasher. Ever.
One advantage of carbon steel: re-seasoning takes less time because the thinner metal heats and responds faster in the oven.
Non-Stick Pans: What Ruins the Coating (And How to Make It Last Longer)
Non-stick pans are the most abused cookware in most kitchens — and they don’t need to be. Most of the damage is completely preventable.
The four things that kill non-stick coatings:
-
Metal utensils. Metal spatulas and spoons scratch the coating with every use. Silicone, wood, or nylon only.
-
High heat. PTFE (Teflon-style) coatings degrade above 500°F (260°C). Medium heat is enough for most non-stick tasks — eggs, pancakes, fish. You don’t need a ripping-hot pan for these jobs. Ceramic coatings tolerate higher heat but are more fragile structurally.
-
Dishwasher. The combination of high heat, harsh detergents, and prolonged water exposure degrades non-stick bonds over time. Even "dishwasher safe" labels are optimistic. Hand wash only if you want the pan to last.
-
Stacking without protection. Stacking non-stick pans directly on each other scratches the coating on every contact. This is one of the most common causes of premature non-stick failure — and one of the easiest to fix.
Cleaning non-stick properly
Let the pan cool before washing — thermal shock (hot pan into cold water) can warp the base over time. Warm soapy water and a soft cloth or sponge is all you need. Never use abrasive scrubbers, steel wool, or anything scratchy.
For stuck food (which shouldn’t happen often if you’re using proper heat levels), fill the pan with warm water, bring it to a simmer on the stove for 2–3 minutes, then wipe clean. Don’t scrub dry.
Storage: the fix that extends pan life
Use pan separators between every non-stick pan when stacking. These felt or silicone pads take up almost no space and eliminate the scratch-on-contact problem entirely.

The BOYAN Pan Protectors come in a set of 12 in three sizes — fits everything from 8-inch skillets to 12-inch pans to Dutch ovens. Washable, reusable, and roughly $10 for the full set. This is a $10 purchase that extends the life of a $60 pan by years. Worth it every time.
Kitchen Knives: Sharpening, Honing, and Storage Done Right
Most home cooks have dull knives and don’t know it — because dull happens gradually. You adapt your technique to compensate, and one day you realize you’re pressing down hard just to get through a tomato.
Honing vs. sharpening: not the same thing
Honing straightens the edge. When a knife goes dull with regular use, it’s not because the blade has worn down — it’s because the thin edge has folded over to one side. A honing rod (the steel rod that came with your knife block) realigns it. Takes 15 seconds and should be done every 2–3 uses.
Sharpening actually removes metal to create a new edge. This is what a whetstone or pull-through sharpener does. You only need to sharpen a knife 2–4 times a year depending on how frequently you cook.
How to hone correctly:
- Hold the honing rod vertically, tip pointing down onto a cutting board.
- Draw the knife down along the rod at a consistent 15–20 degree angle (closer to the blade spine than the edge).
- 5–6 strokes per side is enough. You’re straightening, not sawing.
When to sharpen:
- The paper test: a sharp knife slices cleanly through a sheet of printer paper. A dull one tears or skips.
- The fingernail test: a sharp blade catches slightly on your fingernail. A dull blade slides off without biting.
Storage: the drawer is the enemy
Storing knives loose in a drawer damages the edge on every reach. There are three good options:
- Knife block: Classic, works well, keeps blades separated.
- Magnetic strip: Wall-mounted, takes no counter space, lets blades air dry properly.
- Blade guards: For knives in a roll or bag, blade guards are essential.

The Ergo Chef Knife Edge Guards are rigid BPA-free plastic that snap onto blades up to 10 inches. If your knives live in a drawer or a knife roll bag, these are the right call. About $12 for a set.
What kills knives fastest:
- The dishwasher: heat, moisture, and the blade knocking against other items. Hand wash only, always.
- Ceramic plates as cutting boards: microbes from stone or porcelain dull edges almost immediately.
- Soaking in water: causes handle swelling on wood-handled knives and accelerates corrosion on carbon steel blades.
Stainless Steel Cookware: The One Thing Everyone Gets Wrong
Stainless steel is the most forgiving cookware in terms of abuse — but it has one persistent frustration: sticking and discoloration.
The sticking problem: Stainless steel is not non-stick and was never meant to be. The fix is proper preheating. Heat the empty pan over medium for 2–3 minutes. Flick a drop of water in — it should bead and roll around (the Leidenfrost effect). Now add oil or butter and let it heat before adding food. Done correctly, stainless releases food almost as cleanly as non-stick.
Cleaning discoloration: The rainbow-colored heat stain that appears on stainless is cosmetic — it doesn’t affect performance. A splash of white vinegar on a paper towel and a brief wipe usually removes it. For stuck-on food or brown buildup, Bar Keepers Friend (a mild oxalic-acid powder) works extremely well. Apply to a damp pan, scrub with a soft cloth, rinse.
Dishwasher? Stainless is genuinely dishwasher-safe — but hard water leaves calcium deposits over time. If your pans come out spotty, a regular hand wash is better long-term.
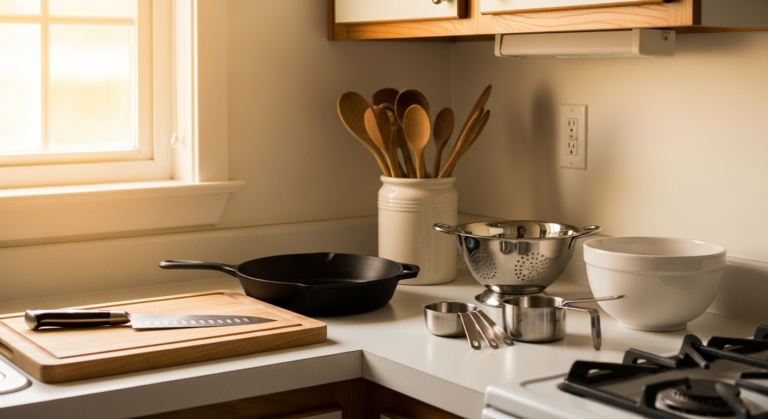
Wooden Utensils, Cutting Boards, and Small Tools: Overlooked Care Basics
Wood needs oil, just like cast iron needs seasoning. Without it, wooden spoons and cutting boards dry out, crack, and harbor bacteria in the splits.
Cutting board care:
- Never submerge wood cutting boards in water or put them in the dishwasher. Wipe clean with a damp cloth.
- Oil monthly with food-safe mineral oil or a board cream (beeswax + mineral oil blend). Apply generously, let it soak in for a few hours, wipe off excess.
- Sanitize with a diluted white vinegar spray if you’ve been cutting raw meat. Let it sit for 2–3 minutes before wiping.
Wooden utensils: Same oil treatment applies. If a wooden spoon develops rough splinters, a light sanding with fine-grit sandpaper followed by an oil treatment brings it back.
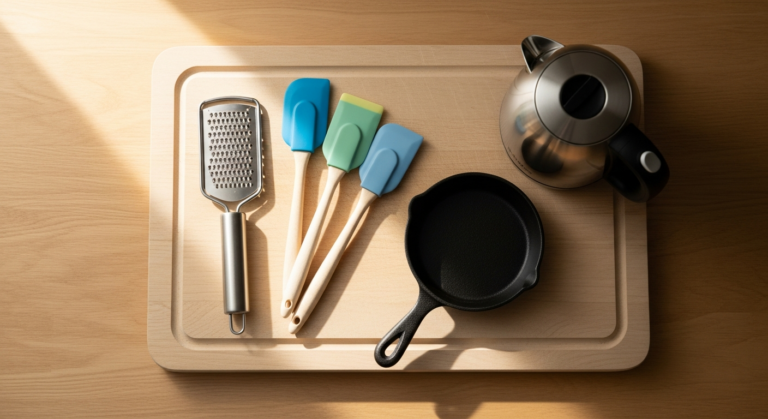
Small tools (peelers, zesters, can openers): These are often ignored until they’re unusable. Rinse immediately after use — the residue on a microplane grater dries hard and is nearly impossible to remove. A soft-bristle brush keeps the tines clear.
The Biggest Kitchen Tool Mistakes (A Checklist)
We’ve collected these from years of kitchen testing. Every single one shows up constantly. (If you’re wondering which gadgets aren’t worth caring for at all, see our list of the most overrated kitchen gadgets on Amazon — single-use tools that create maintenance headaches for no payoff.)
- Putting cast iron or carbon steel in the dishwasher. Strips seasoning instantly and causes rust within hours.
- Using metal utensils on non-stick. Even "metal-safe" claims are generous — one scratch creates a weak point where the coating fails.
- Never honing knives. Most cooks sharpen twice a year (if that) and never hone. The reverse should be true.
- Stacking pans without separators. Destroys non-stick coating and scratches stainless interiors.
- High heat on non-stick. Medium is plenty. Non-stick doesn’t need high heat for any cooking task it’s designed for.
- Storing wet tools. Any moisture trapped in a drawer or cabinet accelerates rust and bacterial growth.
- Leaving acidic food in cast iron. Tomato sauce left in cast iron overnight strips seasoning and can impart a metallic taste.
- Using glass cutting boards. They look clean but destroy knife edges faster than any other surface.
Rescue Guide: Fixing Rusty Cast Iron, Dull Knives, and Scratched Non-Stick
Rusty cast iron: Not a death sentence. Scrub off the rust with steel wool or a chain mail scrubber under hot water — scrub hard until you reach bare iron. Dry completely on heat. Then re-season from scratch using the oven method above. A badly rusted pan needs 3–4 seasoning rounds before it’s ready for regular use.
Very dull knives: If a honing rod doesn’t bring back sharpness, you need a whetstone or a quality pull-through sharpener. For most home cooks, a double-sided whetstone (1000/6000 grit) is the most effective long-term investment. If you’re not confident in your technique, a local knife shop or kitchen store will sharpen professionally for $5–$10 per knife.
Scratched non-stick: Surface scratches on PTFE pans are a cosmetic problem up to a point. If the coating is peeling or flaking off in chunks, the pan should be replaced — you don’t want coating particles in food. Minor scratches don’t meaningfully affect performance and the pan is still safe to use.
Warped stainless or carbon steel: Warping happens when a hot pan hits cold water suddenly. Unfortunately, it can’t be fully reversed at home. Prevention is the fix — let pans cool naturally before washing.
The Right Cleaning Products for Every Tool Type
Quick reference:
| Tool | Recommended cleaner | Avoid |
|---|---|---|
| Cast iron | Hot water + chain mail scrubber | Dishwasher, bleach, prolonged soaking |
| Carbon steel | Hot water + chain mail scrubber | Dishwasher, acidic cleaners |
| Non-stick | Warm soapy water + soft cloth | Abrasive scrubbers, dishwasher |
| Stainless steel | Bar Keepers Friend or dish soap | Steel wool (fine scratches) |
| Wooden boards | Damp cloth + food-safe mineral oil | Dishwasher, soaking |
| Knives | Hand wash with mild soap | Dishwasher, soaking, abrasive scrubbers |
| Small tools | Rinse immediately, soft brush for tines | Dishwasher for wood-handled tools |
Key Takeaways
Taking care of kitchen tools is mostly about avoiding a short list of mistakes — not following a complicated maintenance regimen. The fundamentals:
- Dry cast iron and carbon steel completely after every wash. Oil lightly after every wash.
- Never use metal utensils on non-stick. Never stack non-stick without separators. Never put either in the dishwasher.
- Hone knives regularly. Store with edge protection.
- Oil wood cutting boards monthly.
- Use the right cleaner for each surface — abrasives belong on stainless, not anywhere else.
If you’re building out your kitchen toolkit, our guide to the best cookware sets covers the best options at every price point, with notes on which materials are most forgiving for beginners. And if you want to know which small kitchen appliances are worth caring about in the first place — that’s a good starting point too.
Reviewed by the Kitchaneers team. Last updated: May 2026.