Knife Skills 101: The Truth About the 7 Cuts You Actually Need
In brief: Most guides to knife skills teach you 10 professional cuts, but you only need 7 to cook faster and safer at home. This guide breaks down the basic knife cuts that actually matter — slice, chop, dice, mince, julienne, chiffonade, and the bias cut — skips the 3 that are mostly restaurant showmanship, and gives you a 2-week plan to build real knife skills through repetition, not just definitions.
Most home cooks never take a knife skills class at all, and it shows: an uneven dice, tired hands after a few minutes of prep, the occasional close call with a knuckle. None of that gets fixed by learning all ten classical French cuts. It gets fixed by learning the seven that actually show up in weeknight cooking, practicing them on purpose instead of by accident, and letting go of the three that exist mostly to impress other cooks. Here’s what to focus on first.
Quick disclosure: this post contains Amazon affiliate links, and I earn a small commission if you buy through them, at no extra cost to you. I only recommend gear that holds up to real use in the kitchen.
Why Most Knife Skills Guides Are Overkill for Home Cooks
Search “knife skills” and you’ll land on a dozen culinary-school blogs walking through 8 to 10 French cuts — julienne, brunoise, batonnet, tourné, paysanne, lyonnaise — each with exact millimeter measurements. That content isn’t wrong. It’s just written for people training to work a restaurant line, where a chef-instructor is grading the uniformity of your brunoise.
At home, that’s not your job. You’re trying to get dinner on the table without bleeding on the cutting board. Of the ten “classic” cuts, I use maybe seven on a regular week, and three of them almost never come out unless I’m showing off for a dinner party. This guide teaches the seven first, in the order that builds fastest, and tells you exactly which three you can ignore without losing anything real.
That’s the difference between a culinary-school checklist and knife skills for home cooks: fewer cuts, more repetition, faster results. I’m not asking you to unlearn anything — if you already know the other three, keep them. I’m telling you where to spend your practice time if you’re starting from zero and want your basic knife cuts to actually hold up on a Tuesday night, not just in a classroom demo.
Before You Cut Anything: Grip, Stance, and a Board That Won’t Slide
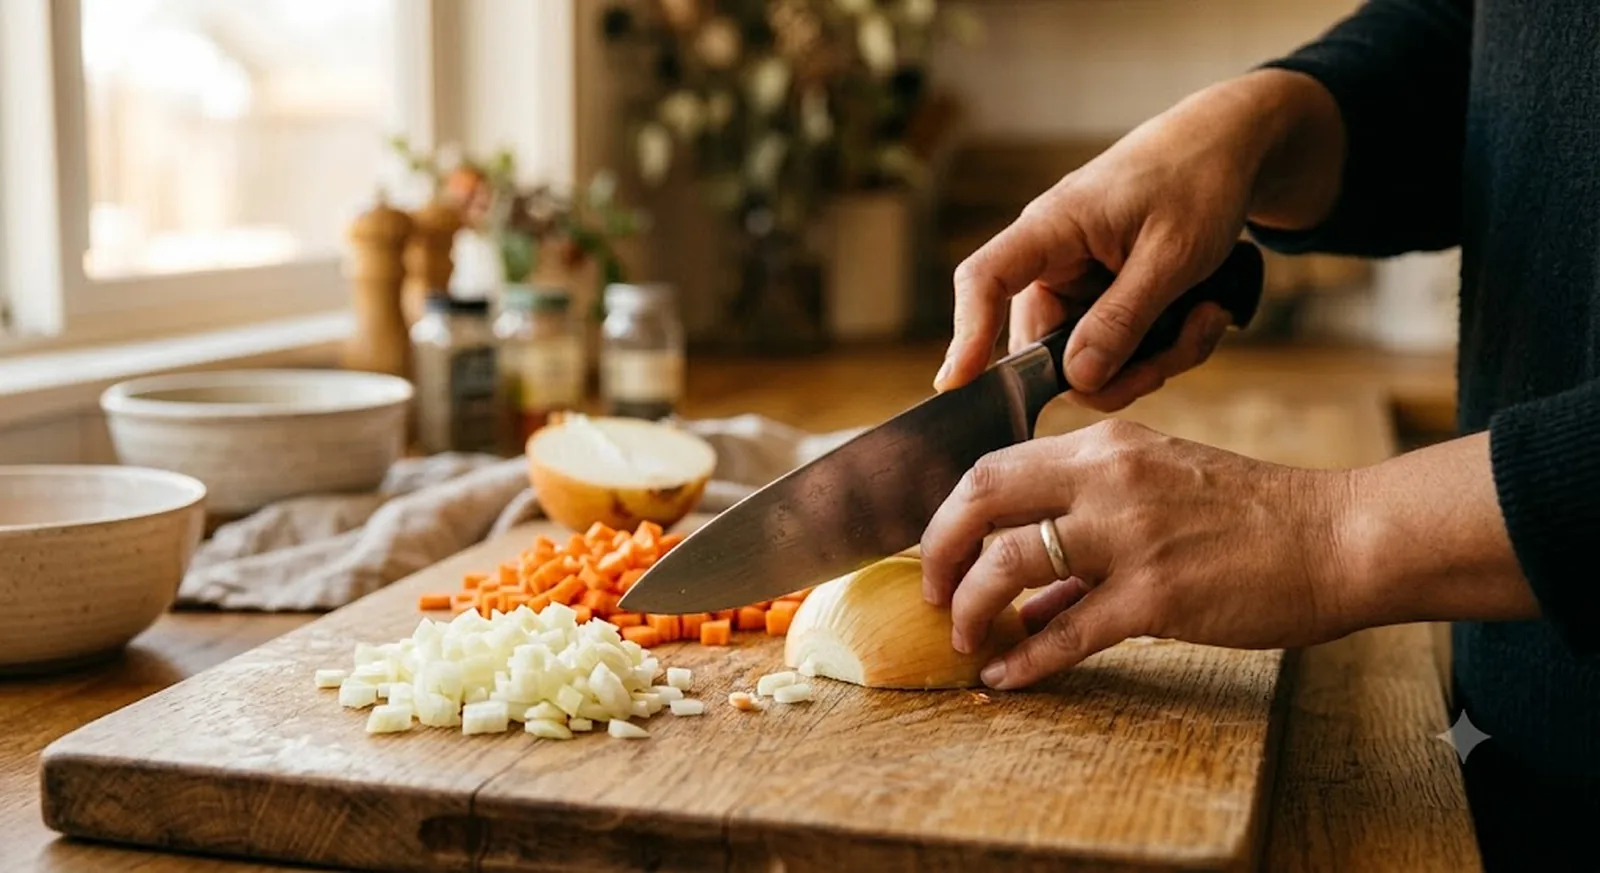
Every guide to how to hold a knife starts in the same place, because it’s the one thing that actually prevents injuries: the pinch grip. Rest your thumb and the knuckle of your index finger against opposite sides of the blade, right where it meets the handle, and wrap your remaining three fingers around the grip. It feels unstable for about a day. After that, it’s the only way holding a knife feels normal.
Your other hand matters just as much. Curl your fingertips under into a claw, so your knuckles — not your fingertips — are the closest thing to the blade. Rest the flat of the knife against your top knuckle as a guide and slide it back as you cut. If the blade ever touches skin, it hits knuckle first.
Before any of that, stabilize your board. A cutting board that skates around on the counter is more dangerous than a dull knife. Fold a damp paper towel or dish towel and slide it underneath — it takes about ten seconds and works on virtually any counter surface, granite included. If you’re cutting raw meat and produce in the same session, use separate boards or wash thoroughly between the two; the USDA’s 4 steps to food safety is worth a skim if you’ve never thought about cross-contamination between a cutting board and a salad.
One more habit worth building now: a sharp knife is genuinely safer than a dull one. Dull blades need more downward force to cut through food, and that extra force is what slips and lands in a finger. If your knife hasn’t been touched since you bought it, that’s the first problem to fix, not the cuts below. If you only take one lesson on how to hold a knife away from this section, make it the pinch grip — it does more for your knife skills than any single cut you’ll learn below.
The 7 Basic Knife Cuts Every Home Cook Should Know
These are the basic knife cuts I actually use, in the order I’d practice them. None of them require a specialty knife — a standard 8-inch chef’s knife handles all seven. Learn these seven well and your knife skills will cover the vast majority of home cooking; everything else is a variation on one of these seven motions.
1. Slice
The simplest cut and the one you already do without thinking: even, parallel cuts across an ingredient. The only real skill is keeping the thickness consistent from the first cut to the last, since uneven slices cook unevenly. Use the whole length of the blade — tip to heel — rather than sawing with just the middle.
2. Chop
A rough cut into bite-sized, roughly even pieces. Chop is the cut recipes mean when precision doesn’t matter — onions for a soup that gets pureed, herbs for a marinade, garlic before it hits hot oil. It’s the fastest cut on this list and the one beginners over-think the most.
3. Dice (Small, Medium, Large)
Dice is chop’s more disciplined cousin: uniform cubes instead of rough pieces. Large dice runs about 3/4 inch and shows up in stews and roasted vegetables that need time in the oven. Medium dice, around 1/2 inch, is the everyday size for a mirepoix base or a chili. Small dice, about 1/4 inch, is what you want in a salsa or a quick-cooking sauté where you don’t want big chunks. Start with a plank cut, stack the planks, then cut across at the size you need — it’s the same motion at three different scales.
4. Mince
The finest practical cut, mostly reserved for aromatics like garlic and ginger that you want to disappear into a dish rather than stand out as a bite. Rock the knife tip-down on the board and drag the blade back and forth in a fan motion until the pile is nearly a paste. It’s genuinely hard to mince “wrong” — the main risk is stopping too early.
5. Julienne
Thin matchstick strips, roughly 1/8 inch square and 2 to 3 inches long, used for stir-fries, slaws, and anything you want to cook fast or eat raw with a bit of crunch. Square off the sides of your vegetable first, cut it into planks the width you want the final stick, then stack the planks and cut lengthwise again. It’s the cut most people find fiddly at first and then can’t believe they used to avoid.
6. Chiffonade
Reserved for leafy herbs and greens — basil, mint, spinach, sage. Stack the leaves, roll them into a tight cigar shape, and slice crosswise into thin ribbons. Unroll with your fingers and they fall apart into confetti-thin strips that wilt into a dish instead of sitting on top of it in big, bitter clumps.
7. Bias (Diagonal) Cut
Slicing at an angle instead of straight down, most often on something long and narrow like a carrot, celery stalk, or green onion. The angle does two real things: it increases surface area so the piece cooks faster and browns better in a stir-fry, and it just looks more deliberate on a plate for almost no extra effort.
The 3 Cuts You Can Skip at Home
Brunoise is a julienne diced down again into roughly 1/8-inch cubes — technically just a smaller, more exact dice. It shows up in restaurant garnishes and consommé. Unless you’re plating a dinner party dish you want to photograph, a small dice does the same job in the pot.
Batonnet is a thick matchstick, about 1/4 inch square, mostly used as the intermediate step before a proper dice or as a shape for a crudité platter. If you’re not building a French fry from scratch or arranging a vegetable tray, you’re already doing this cut without naming it.
Tourné is the seven-sided, football-shaped cut used on potatoes and root vegetables in fine-dining kitchens purely for presentation. It takes real practice, wastes a lot of the vegetable, and changes nothing about how the dish tastes. Outside of a culinary classroom, it mostly shows up for a plated dinner where someone’s taking photos — not a Tuesday-night necessity.
None of these three are wrong to learn — they’re genuinely useful if you cook for a living or love the craft for its own sake. They’re just not what’s holding your weeknight cooking back.
A 2-Week Plan to Actually Get Faster
Reading definitions doesn’t build knife skills — repetition does. This is the same rough progression I’d give a new cook, compressed for a home kitchen. It assumes you already know how to hold a knife correctly from the section above; if the pinch grip still feels foreign, spend an extra day or two there before moving on. Nothing below requires new ingredients you wouldn’t already buy — the point is repeating the same cheap vegetables until the motion stops feeling like a decision.
Days 1–3: Practice grip and stance only. Slice and rough-chop a cheap bag of onions and celery each day. Don’t chase speed yet — chase a grip that feels boring and automatic.
Days 4–7: Move to dice. Practice large dice on potatoes, then medium dice on carrots, then small dice on the same carrots once medium feels easy. Uniformity matters more than size accuracy — a slightly-off 1/2 inch that’s consistent beats a “correct” 1/2 inch next to a 3/4 inch piece.
Days 8–10: Mince a head of garlic every day, even if a recipe doesn’t need it. It’s forgiving and builds the rocking motion you’ll reuse constantly.
Days 11–12: Julienne and chiffonade — carrots or bell peppers for julienne, basil or spinach for chiffonade.
Days 13–14: Bias cut, then a timed test: dice one whole onion to medium dice, start to finish, and time yourself. Compare it to how long the same onion would’ve taken you on day one.
The speed is a nice side effect of practicing this way. The real change is that the pieces finally cook at the same rate, which is the entire point of a knife skills routine in the first place.
The 3 Tools That Make This Easier
You don’t need a knife roll to practice any of this. You need three things, and I’d rather point you to specific ones I’ve actually used than leave you guessing.
A chef’s knife you can practice on is non-negotiable, and it doesn’t need to be expensive to be good. I still keep a Victorinox Fibrox Pro 8-Inch Chef’s Knife in regular rotation — it’s light, the handle doesn’t get slippery when wet, and it takes an edge easily. It’s the knife I’d hand a new cook on day one of building real knife skills, before they’ve earned an opinion on steel type or blade geometry.
The honest con: it looks and feels like a hospital instrument, not a “nice” knife, and if you want something with more heft in the hand you’ll want to size up. For more options across price points, I’ve got a full rundown of chef’s knives worth learning on.

A stable cutting board is the other half of the safety equation. My Hiware 18×12 Bamboo Cutting Board has a juice groove that’s saved my counter more times than I can count, and it’s heavy enough to stay put with just a damp towel underneath. Con: it’s hand-wash only, not dishwasher-safe, and it’s genuinely large — measure your drying rack before you order the 18×12 size.

Last is a honing rod, which doesn’t sharpen a blade so much as it straightens the edge between real sharpenings — the difference actually matters, and I break it down in how to sharpen a kitchen knife at home. I reach for a Henckels Sharpening Steel before almost every cooking session. Con: it will not fix a knife that’s actually dull — you still need a whetstone or a sharpening service every so often, which is worth reading up on in my guide to taking care of your knives long-term. When you’re ready to actually buy one, we compare whetstone, electric, and pull-through sharpeners in best knife sharpeners for home cooks.

If you want the shorter version of “what do I actually need in this kitchen,” I’ve written that up too, in the short list of tools you actually need — a knife, a board, and a honing rod cover most of it.
FAQ
Do I really need to learn julienne and brunoise as a home cook?
Julienne, yes — it comes up in stir-fries and salads often enough to be worth the practice. Brunoise is really just a smaller dice; you can call your small dice a brunoise at a dinner party and nobody will check your measurements.
What’s the difference between chopping, dicing, and mincing?
Chop is rough and roughly even. Dice is uniform cubes at a specific size (small, medium, or large). Mince is the finest cut, mostly for aromatics you want to disappear into a dish rather than stand out.
How do I stop my cutting board from sliding around?
Fold a damp paper towel or dish cloth and place it under the board. It works on almost any counter surface and takes about ten seconds to set up.
Is a dull knife actually more dangerous than a sharp one?
Yes. A dull blade needs more downward force to cut through food, and that extra force is exactly what causes a knife to slip and cut a finger instead of the ingredient.
What’s the best knife to practice these cuts on?
A standard 8-inch chef’s knife handles all seven basic cuts in this guide. It doesn’t need to be expensive — it needs to feel balanced in your hand and hold an edge, which is why I still recommend the Victorinox Fibrox Pro to almost everyone starting out.
Do I need any special training to build knife skills, or can I teach myself at home?
You can teach yourself. Culinary school compresses the timeline and adds feedback from an instructor, but everything in this guide — grip, the 7 basic knife cuts, and the 2-week practice plan — works just as well without formal training. The main thing a class buys you is someone watching your form; a slow-motion video of your own hands does most of the same job.
Great technique only pays off if your edge lasts. Here’s why your knife goes dull so fast — and the simple fixes that keep it sharp.
Good cuts are one piece of a bigger workflow — see the rest of the small habits that make a kitchen run smoother in 12 kitchen hacks professional chefs use at home.
Key Takeaways
- You need 7 basic knife cuts for real-world cooking: slice, chop, dice, mince, julienne, chiffonade, and bias cut.
- Brunoise, batonnet, and tourné are professional/decorative cuts you can skip without losing anything at home.
- The pinch grip and claw guide-hand grip prevent more injuries than any amount of blade sharpness.
- Stabilize your board with a damp towel before you start cutting anything.
- A dull knife is more dangerous than a sharp one — it takes more force and slips more easily.
- Repetition builds knife skills faster than reading definitions — a 2-week practice plan beats a glossary every time.
- A chef’s knife, a stable board, and a honing rod are the only three tools this actually requires.
- These basic knife cuts and this practice plan are exactly what I’d call knife skills for home cooks — not a culinary-school curriculum, just the seven motions that pay off every single week.